This guide explains how to recalibrate the Zebra ZT111 to clear errors and restore print quality. Correct calibration prevents misaligned labels and blurry prints.
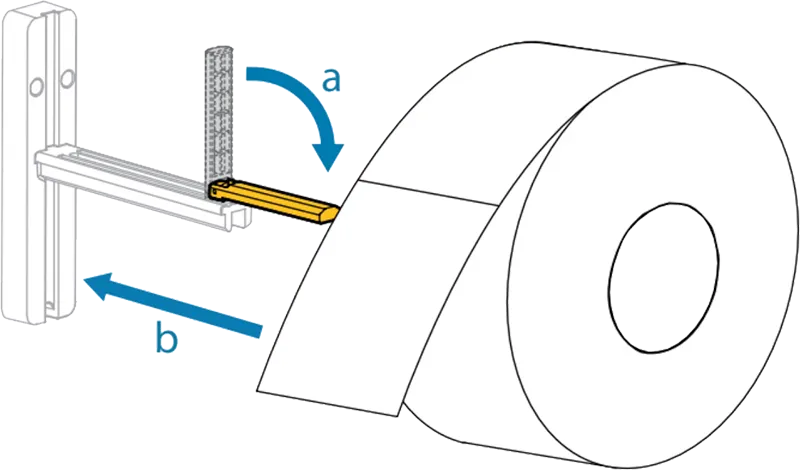
Place the label roll
- Power: Connect the printer to power and turn it on.
- Open: Open the side cover.
- Media guide: Fold the media guide down (a).
- Roll: Place the roll on the media hanger (b).
- Guide: Fold the media guide back up and slide it in until it almost touches the edge of the roll.
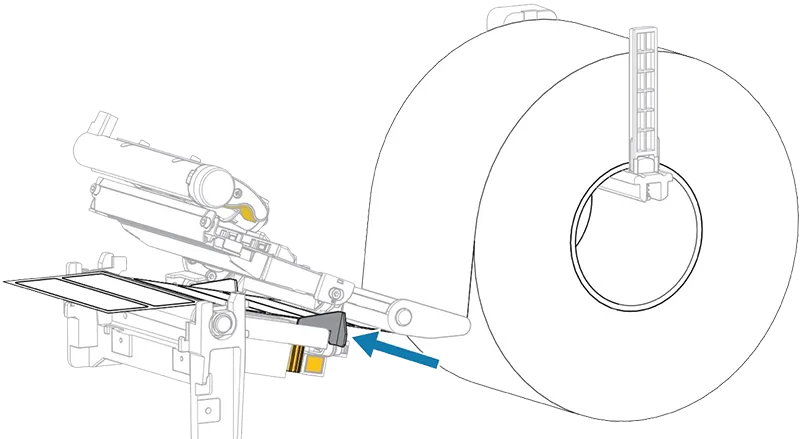
Feed the labels through
Lift the yellow lever to open the print mechanism (a). The print head rises so you can feed the labels and ribbon through (b).

Feed the labels from the roll under the print head as shown in the image below.
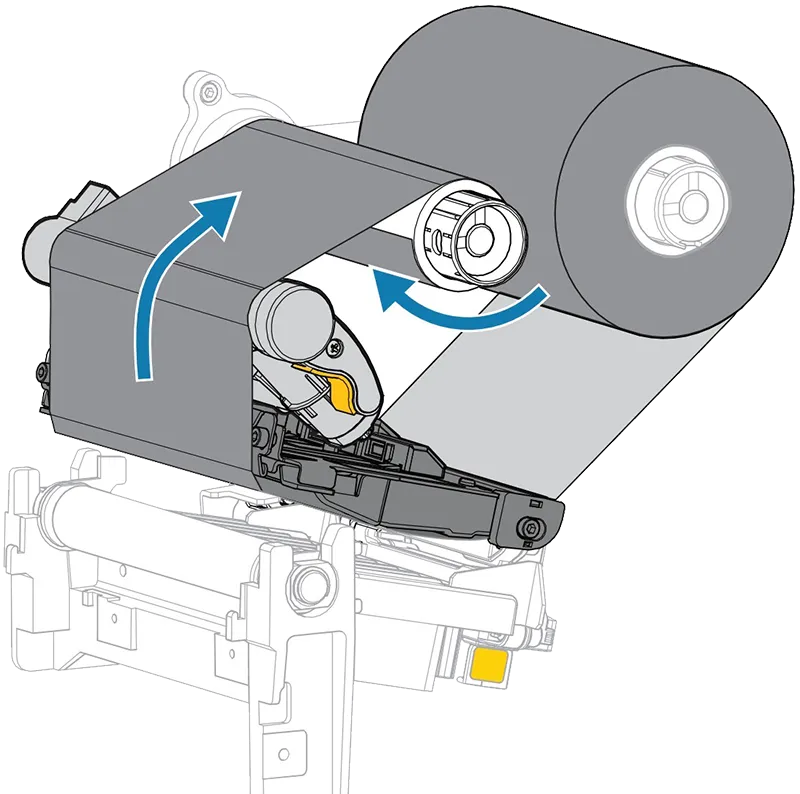
Feed the ribbon under the print head
Follow the steps below. The printable side varies by ribbon type; the smooth, glossy black side must face down. If it doesn’t, the ribbon is loaded the wrong way.
- Supply: Place the ribbon on the ribbon supply shaft as shown.
- Roller: Push the roller fully back.
- Core: Place an empty core on the ribbon take-up shaft and push it back.
- Thread: Thread the ribbon through as shown.
- Wrap: Wind the ribbon around the core a few times, then turn the core to take up slack and align the ribbon.
Close and calibrate
Once the labels and ribbon are in place, follow the steps below to finish.
- Print head: Lower the handle to close the print head.
- Cover: Close the side cover.
- PAUSE: Press the “PAUSE” button.
- Calibrate: The printer runs calibration and feeds a few labels through. The ribbon is tensioned and aligned.
The printer is now recalibrated for the current media and ribbon.
Need help?
Contact Beam Support.